Before I post my ginger biscuit recipe I'd like to take a moment to plug my latest cosplay. :DI've been working on my Ariel for a while and it's finally done! This is a picture with my friend Kerhys who is doing Snow White with me at October expo.
 Understandably we're both pretty excited. :D I love how our outfits are looking. Ariel was my favourite princess as a child and I'm really pleased I've done her dress.Anyway, on to the biscuits! But before I progress too far, allow me to say that I've had a little accident wih my camera... it's not working at the moment so I've had to take pictures on my phone instead, so I apologise for them being a little low-quality.Ingredients:
- 170g butter
- 220g dark brown sugar
- 1 egg
- 60ml golden syrup
- 300g plain flour
- 2 tablespoons ground ginger
- 1tsp baking soda
- pinch of salt
- 2 tablespoons syrup from crystillised ginger
In a large bowl, cream together the butter, brown sugar and golden syrup until smooth. Add the egg, making sure to beat it really well for a few minutes.
 Combine the flour, ground ginger, baking powder and salt and add to the mix gradually, beating well between each addition.
 Next add the stem ginger syrup and mix in well. Put the dough in the fridge and leave to chill for at least an hour, but I usually do it for more.Once the dough has been sufficiently chilled, remove from the fridge and line a baking tray with greaseproof paper. Preheat the oven to 175C/Gas Mark 4. Use a spoon to make smallish balls of dough and flatten them out a little as you put them on the tray. Leave them to bake for 6-8 minutes, or until a deep amber brown.
 Whenever I make biscuits I always do a test biscuit first. This is to see if the dough is ready, sometimes I find I need to add more flour if it spreads out too much, or stick it back in the fridge for a bit.My test biscuit this time spread out rather a lot and was almost as big as my hand. My hands aren't very big, but I thought I'd show you a picture nonetheless.
 Happy baking! These turned out delicious. I also added a pinch of cinnamon into mine for an extra kick, but I didn't include it in the ingredients list seeing as some people don't like cinnamon and it's not a necessary addition. Enjoy!
Mmmmm, dream cheesecake. Not just any dream cheesecake. Prophetic dream cheesecake. It's got to the stage in my life where my usual dreams of killer whales, sunshine and pirates have been interrupted by homemade confectionary creations elbowing their way into my mind.I awoke on Sunday morning, the room bathed in a soft morning light, remembering my night-vision of making a cheesecake. It was a variated version of my signature strawberry and white chocolate creation, with a few significant differences. Firstly, and most notably, there were no strawberries to be seen. Which is unusual because whenever I make anything with a fruit in, I always default to strawberries. They're my favourite baking fruits, I love their strong, tangy, yet somehow very relaxing and still light taste. (They're also very versatile and I can somehow work them into most of my recipes without much difficulty.) However in my dream I had used blueberries, a fruit which I very rarely use in cooking. Instead of pulsing them and swirling them through the main body of the cheesecake, I made a coulis and used gelatine to set it in a sort of jelly on the top.For some reason this cheesecake kept floating into my mind for the rest of the morning, plaguing my head like some kind of epiphany. I had to make this cheesecake. So, as soon as I got back home, I pelted to Tesco and invested in all my cheesecake making ingredients, and didn't vacate my kitchen until my cheesecake had been made.Ingredients:- 250g biscuits (I used chocolate chip cookies this time, but I also heartily recommend shortbread.)
- 75g butter
- 150g caster sugar
- 350g cream cheese
- 300ml double cream
- 1tsp vanilla extract
- 2 sachets gelatine (or 2 sheets leaf genatine)
- 200g white chocolate
- 100g blueberries
- 75ml water
Firstly, you'll need to make the base. Easily the mos efficient way of doing this is by plonking all the biscuits into a food processer and blending them until they're fine crumbs. However, if you don't have a food processer or are Amish, you can do this by hand. Put the biscuits into a plastic food bag and hit with a rolling pin until they're nicely crushes. This might sound rather prehistoric but I promise it's fun. When the biscuits have been reduced to delicious crumbs, melt the butter and stir it in. Add 30g of the sugar too, and press into a cake tin. I used for this a nine inch round one. If it's much smaller it might not accomodate the recipe (my cheesecakes always tend to be a bit on the huge side) so be careful of that. Make sure the tin has been buttered and floured so when you come to remove the cheesecake you don't have any problems.Whenever I line my base, I always raise the sides. I just think it makes a nicer effect when it's finished, but if you prefer the base to be the same thickness all the way across that's fine too.
 Put the base into the fridge. Add the gelatine to a little cold water and put to one side to set. Now we get started on the fun part!Break the chocolate into pieces and put into a saucepan with half the double cream. Melt over a low heat, stirring until smooth. Add the gelatine to the mixture now and stir until dissolved.Put the cream cheese and 80g caster sugar into a bowl and beat until combined.
 Whip the remaining double cream until it forms stiff peaks.
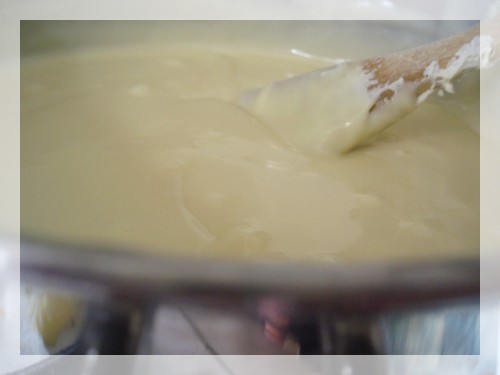
 Add the cream to the cream cheese mixture and stir in gently. Gradually add this to the chocolate mixture in the pan, a spoonful at a time, beating gently until it is fully incorporated. This might take some time, as when beating it tends to look a bit lumpy and gross, as shown by this next picture:
 But when it's all been stirred in successfully it should be lovely, creamy, smooth and tasty. I promise. Add the vanilla extract.
 Get the tin out of the fridge and pour the mixture inside. Leave to set for about 3-4 hours.To make the coulis, put the blueberries, water, and remaining (40g) caster sugar into a saucepan and heat over a low heat. Set the gelatine to one side in cold water again.
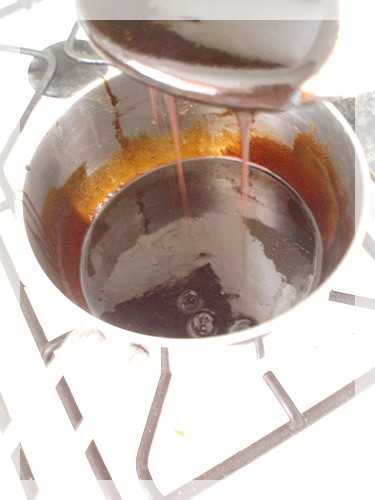
 Leave to simmer until the juices from the blueberries begin to seep out and the sugar dissolves. Stir gently, cooking for about 10 minutes, and add the gelatine. Stir until dissolved.When the coulis is cooked it should look like this:
 Leave to cool slightly and add to your cheesecake. By now the tin is looking very full... carefully put it back in the fridge and leave to set for a few more hours, so the coulis jellies. I left mine overnight.
 Carefully remove the cheesecake from the tin when it's all set.
 Cut yourself a nice, thick wedge and settle down to enjoy it after your hard work. This has turned out to be a very successful prophetic dream indeed, I'll definitely store this recipe away in memory to make again.
I've always thought of ginger cake as a very winterey sort of cake. Warm out of the oven, accompanied by a hot chocolate and a good book, mmmmmm. But, recently I had a request for a combination of ginger and butterscotch, and I thought; why not? So here we are. A blending of ingredients I wouldn't usually put together, but culminating in a deliciously rich, warm cake.This recipe only makes about 8, seeing as I made half a batch this time. My sister isn't keen on ginger so the rest I made vanilla, the recipe for which can be seen on an earlier post.Ingredients:- 100g unsalted butter
- 90g dark soft brown sugar
- 1.5 tablespoons black treacle
- 75ml milk
- 2 pieces of stem ginger
- 1 egg
- 150g self raising flour
- 1 tablespoon ground ginger
- pinch of salt
Firstly you need to preheat the oven to 160C(fan)/180C/Gas Mark 4 and line a muffin tray with cake cases.Put the butter, sugar and treacle in a saucepan. Melt over a low heat, stirring until smooth.
 Allow it to cool briefly and then stir in the milk.Beat the egg. Chop the ginger into small chunks and add to the egg.
 Beat the egg/ginger mix into the butter mixture. Sift the flour, ground ginger and salt into the mixture and combine thoroughly.
 Carefully spoon the mixture into the cake cases and bake in the oven for about 30 minutes. They should look a lovely, rich amber-brown colour. To check they're cooked properly, insert a skewer or a fork into the middle of one of the cakes. If it comes out clean, it's cooked. I always think ginger cake smells fantastic when it comes out of the oven. Mmmmmmmm...
 Now, once you've refrained from eating them all and they've cooled nicely on a wire rack, it's time to make the icing. Usually with ginger cake I would make a ginger fudge icing, but I'm using a butterscotch one this time.You'll need:
- 60g unsalted butter
- 30ml milk
- 1tsp vanilla extract
- 300g icing sugar
- 1 tablespoon butterscotch flavour (if you cant find a good flavouring, you can use something like angel delight, works just as well.)
Put the butter, milk, vanilla and half the icing sugar into a bowl and whisk until blended. Gradually add the remainder of the icing sugar and butterscotch, whisking well until smoooooooth. Swirl onto the cakes. This amount makes enough for quite a lot onto each cake so dont be afraid of piling it on.
 These would be exquisite just left as they are, but I had these nifty little chocolatey things I decided to sprinkle over them instead. Purely of course, because the colours just went fabulously. Yes they did.
 So there you have it. Ginger and butterscotch. Happy baking!!
I was going to call this post "Why thank you, tinkle fairy"; after an Adam West quote my sister has been using all the time lately, but decided against it, seeing as people might be more interested in the flavour cakes I'm detailing with this post.You might have guessed they're caramel related. Yes, caramel cupcakes, flavoured and made ooey gooey delicious with a caramel sauce, topped with caramel buttercream icing and crushed diam. Mmmmm, lovely. Those that have tried these cakes have told me they're their favourites, and they're always devoured quickly. They are considerably more challenging to make, but if you get it right they're well worth the effort.Before you make the cake mix, you need to make a caramel sauce to go in the mix. This needs to cool before it goes into the batter, so make it beforehand to give it plenty of time. For this, you'll need:- 190g caster sugar
- 60g light soft brown sugar
- 120ml water
Put the sugars and 5 tablespoons of the water into a saucepan, and stir over a low heat until the sugar has dissolved. Increase the heat, and cook over a high heat for about 10 minutes, after which the mixture should be a dark amber colour. Remove the pan from the heat and leave it to cool slightly. Stir gently to help it cool, but be careful seeing as the sugar is still extremely hot. Once the mixture has cooled a little, add the remaining water into the mixture gradually, and continue stirring. Hold the pan away from you while doing this, as the mixture may spatter upon adding the water. Cover and leave to cool until ready for use. While you're waiting for it to cool, start on ze cakes. :DIngredients:
- 110g unsalted butter
- 120g light soft brown sugar
- 120g dark soft brown sugar
- 2 eggs
- 1/2 teaspoon vanilla extract
- 125g self raising flour
- 120g plain flour
- 75ml caramel sauce
- 50ml double cream
As usual, firstly preheat the oven to 160C(fan)/180C/gas mark 4.In a large bowl, weigh out the butter, and add both sugars. Cream until pale, smooth and fluffy. With an electric hand mixer, this should take a few minutes. Add the eggs one at a time, beating well after each addition. Add the vanilla exract too.
 Combine the flours in a seperae bowl. Add one third of the flours to the creamed mixture an beat until the mixture just about comes together.
 Add the caramel sauce now, beating well. Add another third of flour and beat again until it just comes together. Next, add the double cream, beat, and add the remaining flour.
 Carefully spoon the mixture into twelve cases, and put in the oven to bake for 25 minutes.
 Bye bye, cakes!During the time they're in the oven, I usually pass the bowl and beaters to my Chief Taster. My sister has been filling this post lately, but this time I tried a little of the mixture myself... And my gosh, it's the tastiest, scrummiest, most delicious cake mix I have ever eaten. My sister never got the bowl.
 Greedy? Who, me?!I found my cakes took just a little bit longer, maybe about two or three minutes more than the recommended time. They came out of he oven all golden brown and lovely looking.
 Slightly volcanoed, but the perfect amount for these babies. Leave the cool for a couple of minutes before taking them out of the tray and putting them on a wire rack to cool properly.Time to ice!
- 60g unsalted butter
- 6 tablespoons milk
- 220g light soft brown sugar
- 280g icing sugar, sifted
- 1/2 teaspoon vanilla extract
Place the butter, milk and brown sugar in a heavy saucepan over a high heat and stir to combine. Bring to the boil, stirring continuously. Allow to boil for one minute.Remove from the heat and stir in half of the icing sugar. Make sure it's sifted otherwise it will go into little globs as you're mixing it, it doesn't make the biggest difference ever but you really have to beat it to get them out.
 Leave the mixture to cool slightly, then add the remainder of the icing sugar and the vanilla. Keep stirring it to thicken to the desired consistency.
 This icing is best used immediately. Swirl it onto the cakes with the flat side of a butter knife, then stand back and admire your precision in all it's caramel beauty.
 Go on. Soak up that caramelley goodness. Mmmmmm.Next, crush a couple of Diam bars (easiest way is to put them in a plastic food bag, then go nuts with a rolling pin. CHARLIE SMAAASH.)Sprinkle these smooshed bits onto the icing when it's still wet to get it to stick, so best done one at a time to make sure the icing is still fresh enough, as it sets very quickly.
 Then you're finished! Well done, now reward yourself with some tasty cake. You earned it.
Today I saw How To Train Your Dragon for the third time. I have a serious love for this film, it makes me want a dragon of my on so very badly. The scenes where Toothless is zooming about through the sky reminds me of the behaviours at SeaWorld and it makes me pine for that dream job. 
I love Toothless. I think my favourite scene is where he watches Hiccup drawing the portrait of him in the dirt, and he mimicks drawing with that huge branch.
So cute.
Anyway, I've also been baking today. I used some of my favourite confectionary of all time, white chocolate mice, to top them with. I used a basic vanilla sponge for the cupcakes and vanilla buttercream for the icing.
Ingredients: (as usual, everything is best used at room temp.)
- 110g unsalted butter
- 225g caster sugar
- 2 eggs
- 150g self raising flour
- 125g plain flour
- 120ml milk
- 1tsp vanilla extract
The method for making these cupcakes is essentially the same as for the peanut butter ones I posted in my first blog. Obviously, just skip putting in the peanut butter.
They bake in the oven at 160C(fan)/180C/gas mark 4, for 25 minutes. When they're done they have the most gorgeous warm, vanillarey cake smell. Mmmmmm. Now leave them to cool on a wire rack, then it's time for icing!

For the icing, I used a simple vanilla buttercream. This is a very versatile icing and can be coloured with a few drops of food colouring, although I just left mine as it is. It can be used to ice a number of flavoured cakes, and this is a good recipe to have on hand for different occasions.
Ingredients:
- 75g unsalted butter
- 40ml milk
- 1.5 tsps vanilla extract
- 400g icing sugar
In a large bowl, beat the butter, milk, vanilla and half the icing sugar until smooth. Gradually begin adding the rest of the icing sugar, beating with the electric hand whisk over a few minutes.

Keep beating until the icing is smooth and creamy. If, after beating for a few minutes, it is too runny to ice with, add a little more icing sugar.
Use a butter knife to spread the icing onto the cakes, using the flat of the knife around the edges and pointing it at the top to achieve a pretty swirl effect.

Now that's done, you can decorate them with whatever you like! I used yellow and purple sugr stars to start off with. I love that combinaion of colours together, and I think it looks even better with those bright cake cases.

After a while I managed to convince myself to stop eating the white chocolate mice and use them on the cakes. After popping them on the top I was very pleased with how they looked, the colours complimen eachother really well and the mice just add that little bit of nostalgic cuteness that works so brilliantly with cakes. Delicious no matter what your age.

Welcome to my blog! This is my first post and today I'm also going to put up a lovely recipe for Peanut Butter Cupcakes along with my ramblings. I haven't used this recipe before but I was very pleased with how it turned out. These cakes are quite rich but still very delicious. Let's start off with the Ingredients:
(makes 12 regular sized cupcakes. Also all ingredients except the cream are best used at room temperature.) Cupcakes:- 75g unsalted butter
- 130g smooth peanut butter
- 190g light soft brown sugar
- 2 eggs
- 1tsp vanilla extract
- 120g plain flour
- 1tsp baking powder
- pinch of salt
- 60ml milk
First make sure to preheat your oven so it gets nice and hot, you want the oven to be at the perfect temperature when you put the cakes in the oven so make sure you do this before anything else so it has chance to heat up properly. The temperature for these cakes is 160C (fan)/ 180C/ gas mark 4. You might want to line a 12 hole muffin tray with cupcake cases so it's ready for your mixture too.
I also went to the trouble of taking some photos of my progress with these cakes; it was my first time making them too so we're in this one together. :PWeigh the peanut butter, peanut butter and sugar and put them in a large bowl.
 Once this is done, use an electric hand mixer to cream the ingredients until they are relatively pale and smooth. Make sure you do this for at least a minute to make sure they're well blended.
 Add the eggs one at a time, and make sure to blend well after you add each one. Then stir in the vanilla extract. At this point you might want to try using a knife or a spatula to skirt around the edges of the bowl and push any mixture around the side of the bowl back into the middle and re-blend. This is just to make sure everything is mixed evenly and you actually use everything which has been weighed out.In a seperate bowl combine the plain flour, baking powder and salt. Make sure to only use 1tsp of baking powder, you want the cakes to rise but they're much easier to ice if they're not looking like little miniature volcanoes. A side note - have you seen Disney's Sleeping Beauty? There's a good scene in that where the green fairy is trying to bake a cake; she pronounces the shorthand for "teaspoon" as "tsp" phonically... it never fails to amuse me and now whenever I see that in recipes I always think of her. And when she "folds in the eggs"... Oh dear...Anyway. Add one third of your flour mixture to the creamed mixture and beat well with the whisk.
 Then add one third of the milk and beat well again. Repeat until all the flour and milk have been added.Now it's time to put the finished mixture into the cupcake cases. When I made this my mixture was runnier in consistency to the usual cakes I make, so to aid in filling the cases without making a giant mess I used a jug to pour the mixture in.
 As you can see I managed to make a little bit of mess. But only a little bit. Now put these in the oven and leave them to bake for about 20 minutes. As tempting as it may be, try and refrain from opening the oven door when they're cooking, as the slightest bit of cold air on them while they're still baking can result in sinkage - which you don't want. Trust me.After 20 minutes, you can open your oven and you should be greeted with something like this:
 They should be raised gorgeously and a nice golden brown colour when done. Leave them in the tin for a few minutes to cool slightly, then carefully put them on a wire rack to cool completely.Now for the icing. :DUsually when making cupcakes I go for a simple buttercream icing. This is versatile; easily modified to suit different flavour cakes and can be topped with pretty much anything to decorate. This time though I went with a chocolate fudge icing, slightly faffier to make but it compliments the peanut butter really well and tastes lovely.For this you will need:
- 60ml double cream
- 30g unsalted butter
- 300g milk chocolate
- 1/2 tsp vanilla extract
Place the butter and the double cream in a saucepan over a very low heat. Stir the mixture continuously until all the butter is completely melted. Don't allow it to boil or else it will burn and this really impairs the flavour. When all the butter is melted take it off the heat and add the chocolate, broken into pieces, into the mixture.
 Mmmm. I know it doesn;t look the prettiest at the moment but I promise; stir the chocolate continuously until it's all melted and it will look much tastier.
 Still not appetising yet?This can take about 10 minutes to melt completely, so don't give up. If you need to, turn the heat back on but only very low, and keep stirring it until it's all melted. When you're done it should look something liiiiiike:
 Much better. :D Now add the vanilla and stir again so it's nicely incorporated.This icing might feel as though it's too runny to use. So allow it to cool slightly, and if that doesn't do it then beat it slightly just before you ice your cupcakes.I usually spiral my icing on with a butter knife but today I got a bit lazy and just used to wooden spoon to blob it on.Well when I say "blob it on", I mean i put a bit of icing on then smoothed it roughly over my cakes until they looked vaguely presentable.
 To decorate I would have preferred to use peanut butter chips. Sadly though I couldn't find these anywhere, so instead I went a-hunting for Reese's Pieces. You would have thought they'd be far easier to come by, but for some reason over the last week or so I've been planning on making these, I just haven't been able to get my hands on them. :( So instead I had to make do with chocolate buttons.
 Et voila!Peanut butter cupcakes. Enjoy, and thanks for reading!

 Understandably we're both pretty excited. :D I love how our outfits are looking. Ariel was my favourite princess as a child and I'm really pleased I've done her dress.

 Next add the stem ginger syrup and mix in well. Put the dough in the fridge and leave to chill for at least an hour, but I usually do it for more.